This was written by Cherie from you & mie for the Miss Matatabi Makers series.
∆ ∆ ∆
Hello and Happy New Year! You may be reading this in 2015, but I’m actually sharing some of my last couple of projects from 2014! But as usual, I’m just a tad bit late. Perhaps that should be my new year’s resolution 😉
Anyways, when I was choosing my fabric for this month, Frances had suggested some white quadruple gauze (yes, you read that right – quadruple) and mentioned that she’d been dreaming of trying some shibori dyeing with it. So I basically decided to steal her idea and do the shibori dyeing myself! 😛 Recently, this Japanese form of dyeing fibers (similar to tie dyeing) has been gaining popularity. I’ve seen bloggers and seamstresses trying it out, as well as accessories and clothing featuring shibori dyed fabrics being sold in various places. I was a little on the fence about it at first. It looked like monochromatic tie dyeing! But I love the beautiful deep blue that is produced from indigo dye and it definitely reminds me of traditional Japanese fabrics that I’ve seen my whole life. And now that I’ve done it, I absolutely love it. I want to shibori dye ALL THE THINGS!
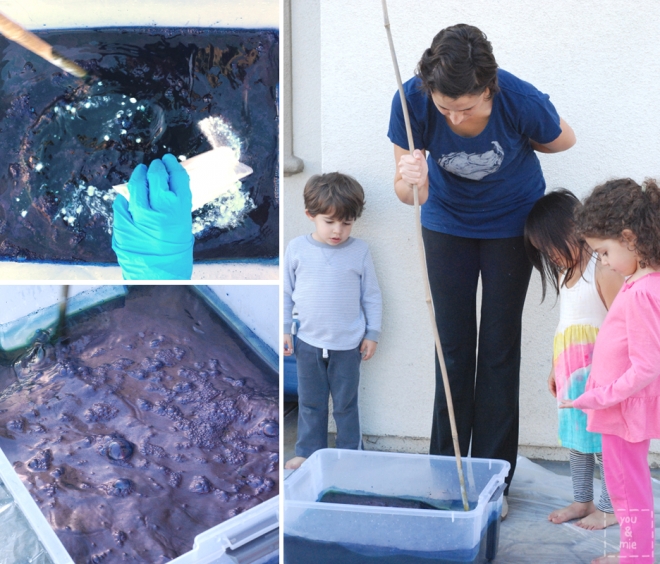
Preparing the dye bath! No children were dyed during this process.
So I decided to try out a few different fabrics from the Miss Matatabi shop:
- White quadruple gauze (currently out of stock)
- Off white double gauze
- nani IRO Itsura textile Jun Kan A
I also dyed a pair of knit baby leggings and some cloth napkins that I bought at Dharma Trading Co. along with the Indigo Dye Kits.
Shibori comes from the Japanese word “shiboru” which means to squeeze, wring or press.
I won’t go into the whole process of shibori dyeing, or dyeing with indigo, because there are already so many great resources and tutorials out there. It really is a fascinating process, but it’s quite involved and I learned a few things that I thought I’d share with you in case you decide to try it out!
1. Plan ahead. The process takes time and quite a few materials. Make sure you read all the directions and gather all the things you will need and allow yourself enough time (it about half a day from start to finish).
2. Do it with a friend! Not only is it way more fun, but it’s definitely handy to have an extra set of hands to reference the directions or help stir while you’re all gloved up and opening containers of ingredients. Also, most dye kits will make a large amount of dye – enough for several people to use! I met up with my friend, Ashley (you can see her in the picture above with her two kids and one of mine), and it was so much fun!
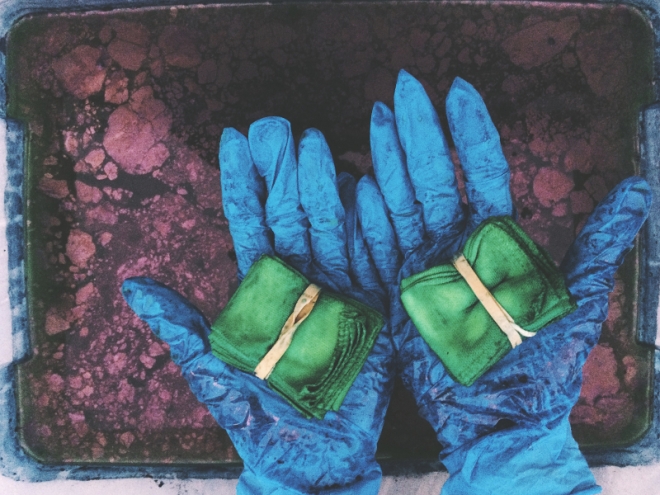
The fabric comes out of the dye bath a bright, almost neon green. Then it changes to a deep blue as it oxidizes! Photo by Ashley
3. You’ll need space, and you’ll need to protect it. The dye bath has a strong smell, so choose a space outside or a very well ventilated space and be sure to cover it with a tarp or drop cloth. It’s nice to have a large surface to work on and place your fabric and not have to worry about drips.
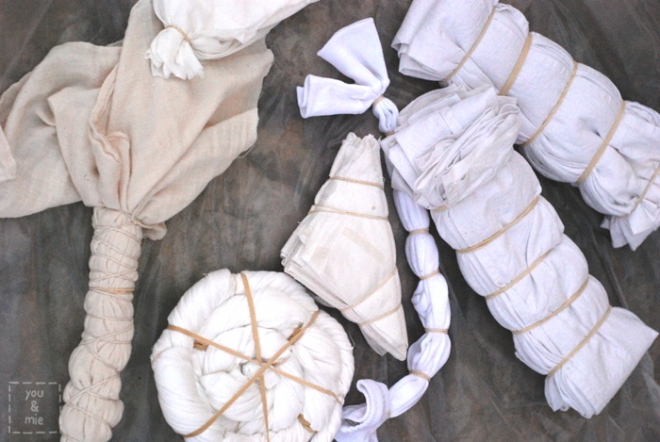
4. Try out all sorts of tying techniques and don’t worry about how it’s going to come out! This was hard for me. I got caught up in how I wanted to fold and tie my fabric and what it was going to look like. It’s really impossible to predict what it’s going to look like when it’s your first time, so just experiment with lots of different fabrics and methods and it’ll be soooo exciting to open up each fabric and see your original design! It was like Christmas morning, I swear. And now that I understand a little better how certain techniques will work out, I’m really excited to try it again!
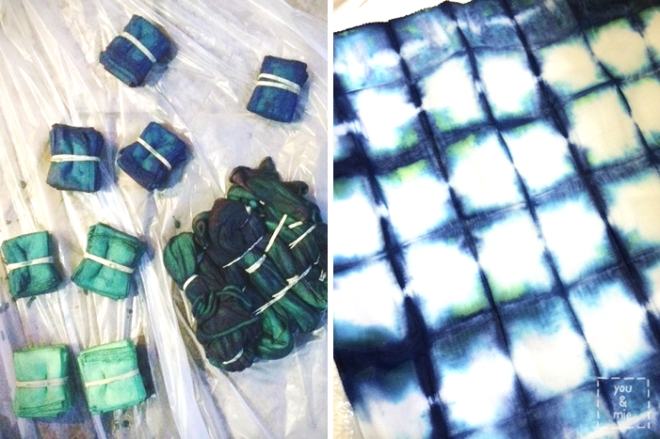
The small squares are the cloth napkins, folded like an accordion in one direction and then again in the other direction. You can see the ones near the top are blue because they came out of the dye bath first. The ones hear the bottom just came out of the dye bath and are still bright green. On the right is one of the napkins unfolded and the greenish parts will change to blue as they are exposed to oxygen.
Other than those tips, just read the directions of your dye kit thoroughly and visit online tutorials for other tips and tying ideas and have fun! I referenced these sites: Honestly WTF and Design Sponge.
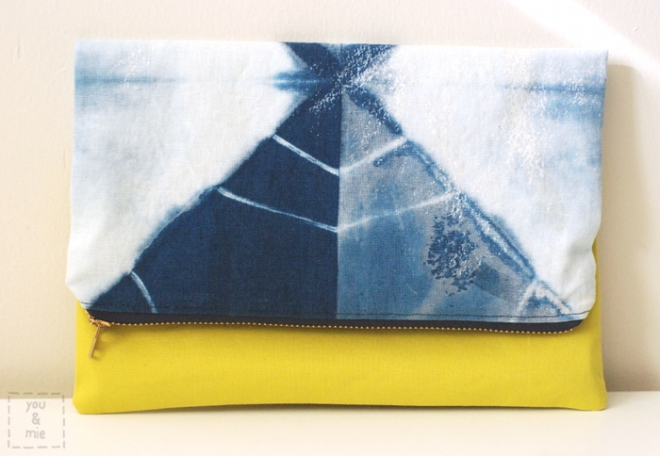
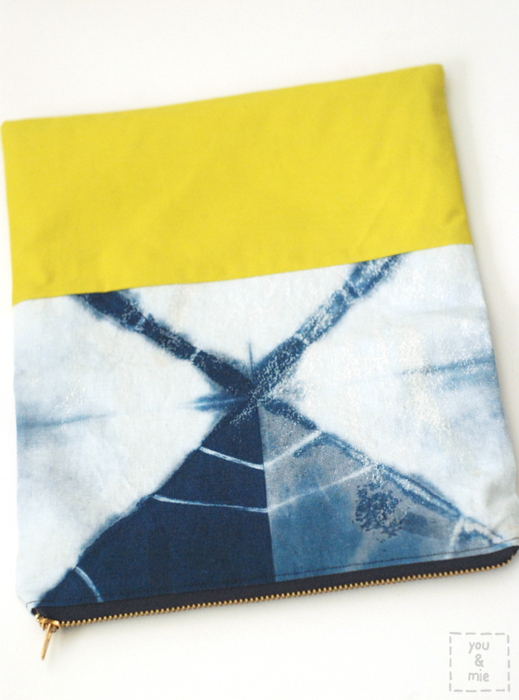
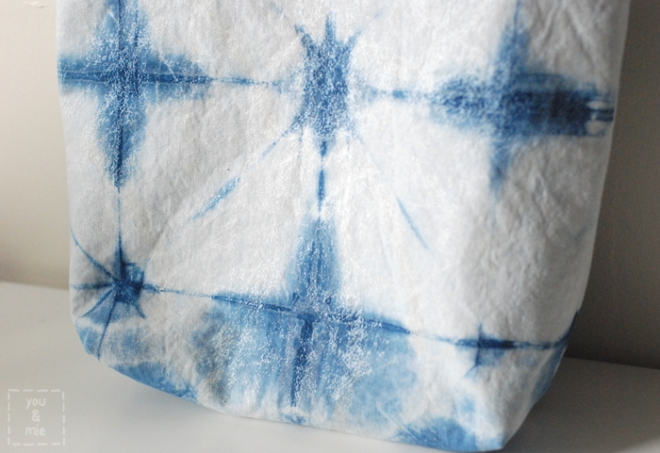
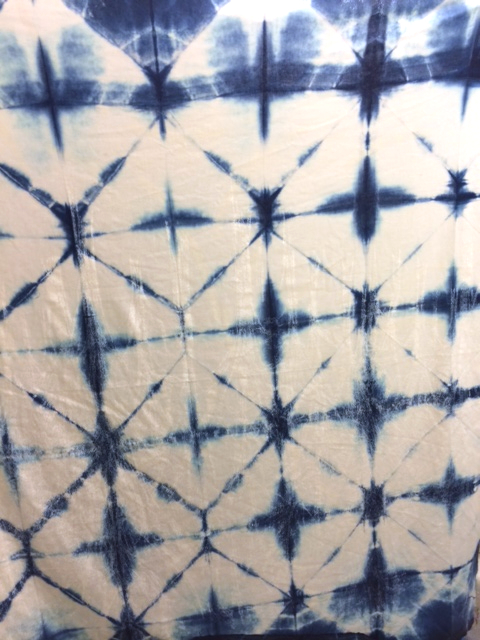 Ok, let’s move on to the projects I’m sharing here today! The fabric above is the nani IRO Jun Kan A. It’s white with a very subtle tree design in shimmery white ink. It is VERY subtle. Honestly, it’s hard to see at all when looking at the fabric in person. But I wanted to see if the ink on the fabric would resist the indigo dye and it did! It created a really unique layered look. The fabric is a cotton/linen blend. It’s beautiful and high quality like all nani IRO fabrics. It’s very easy to sew with and a nice medium weight. I decided to support it with interfacing to give it a little more structure for a foldover clutch that I made for my sister.
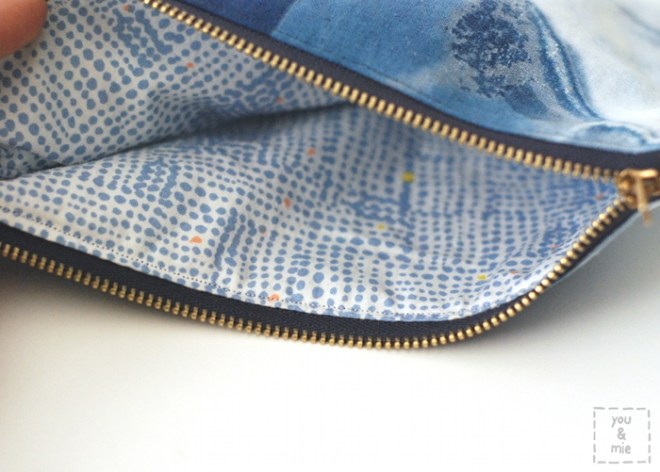
For the clutch, I used skirt as top’s Foldover Doily Clutch tutorial, but without the doily and with some color blocking. I love this tutorial. It’s so quick and simple, but so awesome and such a great gift! I chose one of my fabric parts of the dyed fabric and complimented it with some Kona cotton in a chartreuse color.
The inside is lined with Leah Duncan’s Terrain Slate.
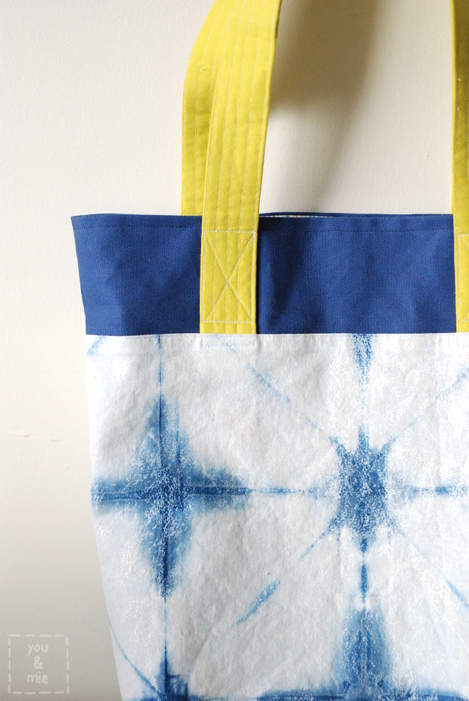
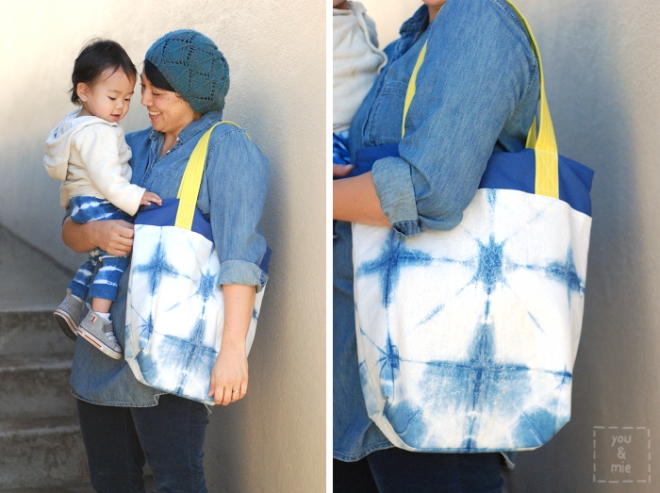
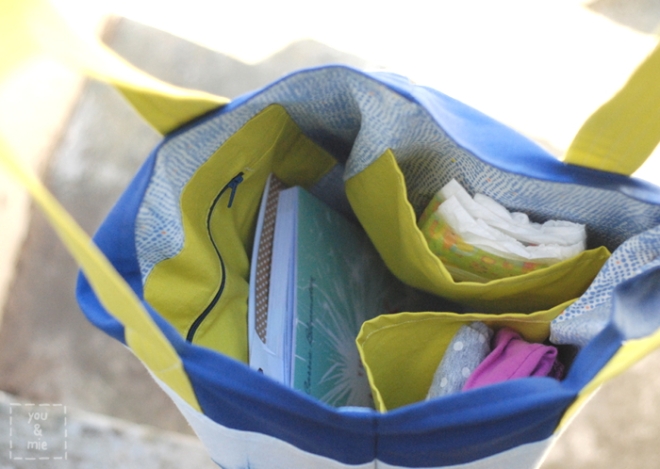
Then I used all the same fabrics (plus some duck cloth) to make a tote bag for myself!
Can you see the subtle design that shines through where the fabric was dyed blue?
I didn’t follow a particular pattern or tutorial for this bag, but I was inspired by this one and this one is helpful if you’ve never made a tote bag before (though instead of attaching the lining like Dana, I used the same method as in Kristin’s clutch tutorial).
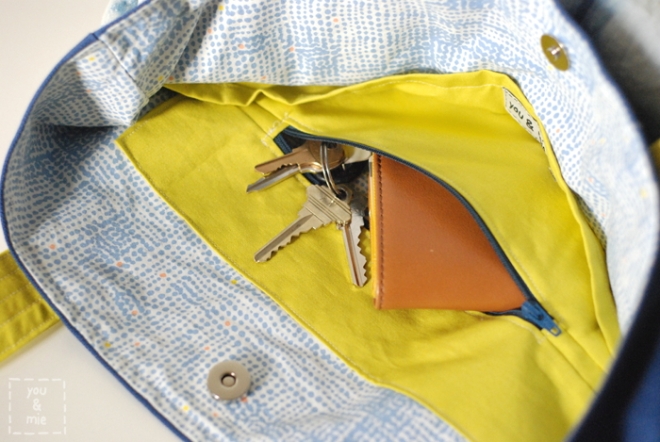
I wanted to add at least one zipper pocket for all the things I want to keep safe and added deep open pockets on the other side. I installed magnetic closures for the first time and though I was nervous, they were totally easy to put in and I like being able to close the bag so my stuff isn’t exposed and spilling out. The bag isn’t perfect and I’d probably tweak it a bit if I were to make another one, but I’m pretty pleased with how useful it is.
There’s something very cool about dyeing your own fabric and knowing that it is absolutely one-of-a-kind and that no one is walking around carrying the same bag as you 🙂
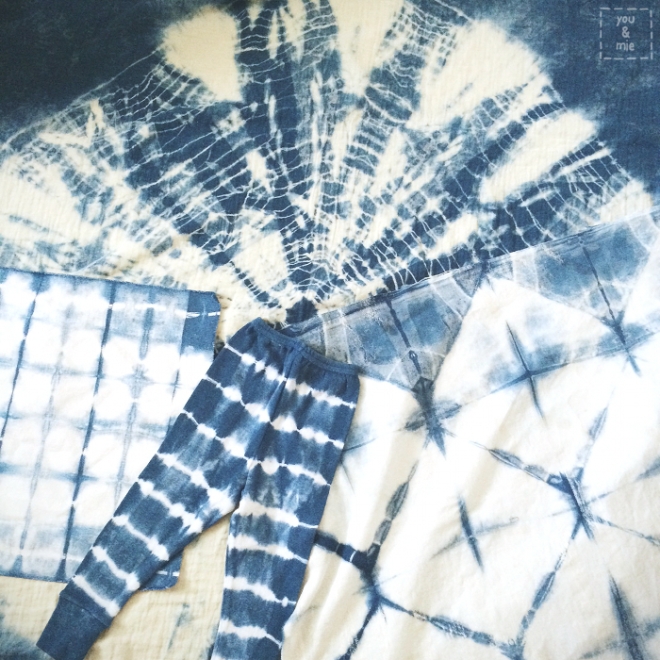
Here’s a little peek of how some of the other things I dyed came out. I still have the double gauze and quadruple gauze waiting to be sewn up! If you follow me on Instagram (@youandmie) you can probably see those projects in the coming weeks. And I seriously want to go and dye EVERYTHING now! Don’t you?
Anyways, I hope that you’ve all had a wonderful holiday season and I wish you a very very happy new year. I’m looking forward to an awesome 2015!
∆ ∆ ∆
Thank you, Cherie! Connect with Cherie on her blog, instagram, facebook, and pinterest.







7 Comments
Everything came out great!!
it’s been a few years, but in case you remember–how did you set the dye into the double & quadruple gauze fabric? did you throw them in the washing machine after dying?
thank you!
Just beautiful-I really need to try shibori
Thanks you guys!! It was really fun!!
these are so amazing. im obsessed with shibori. well done.
Cherie it’s all gorgeous!
That looks absolutely amazing, the possibilities of this… I completely understand how you got caught up in the process of folding, so many choices 🙂
[…] So I’ve got a Miss Matatabi Maker post up over on the Miss Matatabi blog. Sure, it may seem like the first of the new year, but it’s actually supposed to be my last […]